In this guide, I’m going to share with you a simple step-by-step method for how to start a travel blog from start to finish.
Right now, if you commit to starting a blog and maintaining it, the potential benefits and opportunities that can come as a result of blogging are endless.
Get yourself a cup of coffee (at least I’m going to have one) and let’s continue…

In 2008, a few weeks after graduating from University, I traveled to South America.
Armed with my point-and-shoot digital camera (I think it was a 3.2 megapixel), I was ready to travel and eat, and take as many photos as I could.
After a few months of traveling, mostly in Argentina and Chile, I returned to the US for about a month to attend the wedding of my sister.
During that time, I thought:
“What will I do with all these photos… will they just sit on my computer forever?”
While pondering this, and while surfing the internet, I decided to start a travel blog.
I could blog as a way to keep my family and friends updated about where I was and what I was eating, and to just remember the things I did for myself – like a personal (but public) journal, all in one.
I had zero experience of how to start a travel blog.
The great news is:
You don’t need to be a designer or coder to start your own blog.
And so, having little clue what I was doing, I decided to figure it out.
I registered migrationology.com, and decided I was going to start blogging as I traveled.
Just after starting my first blog, I bought a one-way plane ticket to Asia (Bangkok to be more specific), this time, with no plans to return to the US anytime soon.
A lot has changed since the beginning of 2009, when I first started migrationology.com.
I’ve learned many things… not just about blogging, travel, and food (though I’ve learned loads of both), I’ve also learned about writing, internet marketing, social media, psychology, freelancing, website maintenance and design, and more.
Starting my initial blog, and becoming a blogger has easily been one of the most rewarding things I’ve ever done (and it can be for you too).
NOTE: Before we proceed, I just want to let you know that you DON’T need to be a computer engineer or a coder to start a blog. I consider myself an ordinary guy who just loves to travel and eat, and I figured out how to make a blog, and I’m 100% positive you can do it too.

How to start a travel blog
Although I write about food, one of the questions I get asked frequently is:
“Mark, how can I start a travel blog or a food blog?”
So I thought, I would just type up everything I’ve learned about blogging, and try to break it down into a simple 5 step process, so you can easily start a blog too.
But before we jump into it, I’m just going to quickly go over what a blog is, and how it functions.
A blog, or a weblog, is basically a website that’s updated with posts.
It can really look like any other website, have a home-page, and a resource page, and in fact many websites you probably read are blogs (or they are set up like blogs), even if you didn’t know it.
Here’s a brief overview of what we’re going to be covering in this 5 step how to start a travel blog process (and you can go to each section below for much more in-depth coverage, and details on how to complete each step):
- Domain – A domain is your own unique url, mine is migrationology.com. Yours could be yourblog.com.
- Host – A host is a server that stores your files, so when someone types yourblog.com into a browser (like Google Chrome or FireFox), your blog will show up on their computer screen or mobile device. Starting out, I recommend Bluehost which I used in the video to create markwiens.me.
- WordPress – WordPress is an open source platform for building blogs and websites, and archiving all the content.
- Design – A design is the face of your blog, how it looks.
- Start blogging – One of of the biggest aspects about starting to blog is simply blogging. What I love about blogging is that it’s not just about writing, but instead you get to mix in words and photos and videos, and be creative – however you want.
I would encourage you to first watch the video below, where I will walk you through the steps of how to start a travel blog, but you can also scroll down for all the details and information:
First, watch the video below:
(If you can’t see the video, watch it here)
Now that you’ve watched the video, let’s begin with the 5 steps we talked about.
This post is a little long because I really want you to understand what a blog is, and what makes a blog function. However, it’s really very simple to create your first website, and it should take just 10 – 30 minutes. The hardest part is thinking about what domain you want to choose.
Step #1: Register Your Domain
What is a domain?
Your domain is the URL of your website, like food.com or markwiens.me.
Why can’t you just use a free blog, like blogspot.yourblog.com or wordpress.yourblog.com?
Get exclusive updates
Enter your email and I’ll send you the best travel food content.
That’s a great question, and you could.
However, the reason it’s much better in my opinion to register your own domain and host it, is because you then own your content. If you blog on a blogspot, your content is owned, and can be controlled by blogspot.
Having your own domain (yourblog.com), you’re able to control your content, deal with it how you like, and do things like put up advertising, or sell your eBooks. It just gives you a lot more freedom, plus it looks much better.
Also, it can be a real pain to begin with a blogspot or other blog provider, then down the road, switch to your own domain.
If you’re serious about blogging, don’t mess around, just invest in your own unique domain now.
Note: If you plan to sign up for hosting, like with Bluehost, which I’ll cover in step #2 below, you can often get a free domain, when you sign up for hosting – so if you plan to sign up for hosting, you could start at Step #2.
Where do I register my domain?
There are many sites that register domains, but here are two reputable sources:
- GoDaddy – I started with GoDaddy, and I still have all my domains registered here. They used to have a bad reputation for customer service, but I haven’t had any problems myself, and they make it easy to register domains.
- Namecheap – This is another big domain registrar, and although I don’t have experience with them, I think it’s a great option.
- With your hosting account – Like I mentioned in the note above, and I’ll mention again in step #2, if you’re going to get hosting for the first time, you can often get a free domain with it, so that’s a nice added bonus. If this is your case, you can actually jump over to Step #2 right now.
How much does a domain cost?
Price: About $10 – $13 per year, a small investment, and really worth it.

Step #2: Get Hosting (Server)
What is hosting?
A website or blog are a bunch of files, stored on a server (basically a computer that’s on all the time), that can be accessed from a browser (like Firefox or Chrome).
A host is the computer (a dedicated computer called a server) where your blog files are stored, and without it, no one would be able to access your blog / website.
Hosting is kind of like renting an apartment or an office, it’s the place where you store your stuff and start building your blog.
So as you can imagine, your host is very important.
Everything you work on and write about will be stored on your host. If your host has a record of being out of service (that’s called downtime), or not very tight with security, that’s not a good thing.
You wouldn’t want your apartment to get broken into, would you? Same goes for your travel blog.
That being said, there are many great hosts to choose from, and they can be very affordable – just a few dollars per month.
Over the course of running my travel and food blogs, I’ve changed hosts a number of times. I started off with a host I wasn’t too happy with – they just didn’t have great customer service and didn’t handle my website traffic well, and the security of my site wasn’t good enough either – I had a number viruses and malware scares (it’s not a fun experience when you’re nurturing your own blog).
I’m now with a host I’m extremely happy with called Web Synthesis, though I wouldn’t recommend it if you’re just starting a blog, because it’s quite expensive, and there’s no need for it from the beginning.
A few different types of hosting:
- Shared hosting – This is what you should begin with (I formerly used shared hosting) – it’s the cheapest option (often around or under $5 per month), and it’s really all you need to begin with. Your files will be stored on a shared server along with other websites, and for just about all your blogging needs, this should be more than adequate.
- VPS hosting – I’m now using VPS hosting for both migrationology.com and eatingthaifood.com. VPS stands for Virtual Private Server, and it allows for more space on the server and it will handle more traffic to your blog. I chose to use VPS hosting to improve the speed and handle the traffic of my blogs.
- Dedicated hosting – Some hosts will offer dedicated hosting, which typically means you have your own dedicated server, all to yourself. It’s not really necessary unless you have a high traffic site, so at this point I don’t think you need to worry about this at all.
Hosting companies I recommend:
Bluehost (starts at $3.49 per month) – Bluehost is one of the best options for hosting – they provide an easy to use interface, one-click install of WordPress (which we’ll be setting up in Step #3), good security, and customer service. On top of that, for the quality of their hosting, it’s hard to beat their prices. I have a hosting account with Bluehost, and so far I’ve been extremely happy with them, and I would strongly recommend them if you are starting a blog.
Web Synthesis (starts at $47 per month) – I now use Web Synthesis to host both of my main two blogs. It’s a premium host, that caters directly to sites using Wordpress, and I have VPS hosting. I pay $97 per month to host my sites on Web Synthesis, and though that’s expensive, for where my sites are at in terms of traffic, and the goals I have for my blogging, I’m very happy with their hosting.

Step #3: Install WordPress
What is WordPress?
WordPress is free piece of web software that can be used as a blogging platform and a content management system (in simpler terms, it’s the program your blog operates on).
According to their website, more than 60 million blogs around the world operate on Wordpress, and in my opinion it’s the blogging platform standard.
Thousands of websites you’ve probably used, like The New York Times and Food Gawker, use WordPress to power their websites.
Just so you don’t get confused, there are two WordPress websites:
- WordPress.org (.ORG)- This is the open source free software that we’ll be using.
- WordPress.com (.COM) – This is where you can start a free blog, and it will look like this: wordpress.yourblog.com.
But if you’re reading this guide on how to create a travel blog, I’m sure, at least I hope you’re ready to invest to use your own domain and host.
What I explained above is just for you to know (and I think it’s important to learn), but you actually don’t even need to go to wordpress.org, you can install the WordPress.org software, and have it show up on your domain, directly from your hosting account.
Installing WordPress on your domain
Once you have your domain and your hosting account ready, you will be able to login to your hosting account. Often it’s called the dashboard, or panel, or something like that.
Almost any hosting service you choose, will offer what they call an auto, or one-click install of WordPress.
This means that all you have to do is find it in your dashboard, and choose the “click to install WordPress” button. It usually takes just a few minutes or so to install all the WordPress files.
I’ll cover the information in detail for Bluehost, since I have an account with them, but the steps should be relatively similar if you choose a different host, and the host you choose will have specific information about how to install WordPress.
Anyway, basically just click on the domain you want, then click on install WordPress, and wait until the install completes.
Your blog is now live to the world. So much potential is already at your fingertips.
Using the default username and password, login to your new blog, and you’re ready to start installing plugins and ready to start writing.

Install Plugins
Along with installing WordPress, you’ll need to install a few plugins.
Plugins are little extra snippets of software (code) that will give you more options – from making your website function better to making it look better.
There are a ridiculous amount of plugins available, but here are a few I think are necessary, and I use them:
- WordPress SEO by Yoast – SEO stands for search engine optimization, but it basically means optimizing your website and blog posts to best be found on Google and other search engines. Wordpress SEO by Yoast handles the backend side of SEO for you. Here’s a guide to setting up this plugin.
- Akismet – This should be on your core WordPress installation already, but you need to activate it by following the directions. It protects your site from SPAM.
- W3 Total Cache -This plugin helps to cache your website for a quicker user experience.
- XML Sitemaps – This notifies search engines of your site and blog posts
- SumoMe – Good free tools for social media and list building
I’ve linked to all these plugins, but actually the easiest way to upload them to your travel blog is by doing this: Go to your WordPress dashboard > Plugins > Add New > Search for it > Install Now > Activate.
You now have now started a perfectly functioning blog.

Step #4: Improve Your Design
While publishing posts is the most important part of blogging, I think design is also huge.
According to Neil Patel, on the internet today people have an average attention span shorter than a goldfish, and almost everyone, myself included, really do judge a blog by its cover, without thinking about it.
If you see a blog or website that looks like it was created in 1998, no matter how good the content is, I can tell you right now, you and I both are probably going to click away in a couple seconds.
Also, I remember for myself, when I had an old and tacky design that I personally wasn’t happy about, I wasn’t as inspired to write and publish articles. Why would I want to work so hard on a post, only to have it look tacky and old?
I’m not saying you need a perfect website design.
In fact, if you worry too much about design, you might never be fully satisfied. Instead, just make sure your blog is modern and has a design you’re happy with.
The wonderful news is, you don’t need to be to a professional designer to make your blog look fantastic.
I have almost zero design skills, and I was still able to create both migrationology.com and eatingthaifood.com on my own.
Here’s how: WordPress themes
What is a WordPress theme?
You have a domain, yourblog.com, you have hosting, you have installed WordPress, now you need a theme.
A WordPress theme is like the body skin of your blog, it is the visual aspect of your blog. As Studiopress* puts it, it’s the body of your car.
When you install WordPress, you are automatically given a default theme, but by changing the theme, you can make your blog function and look much better.
You have a couple choices:
Free Themes
There are loads of free themes available, and you can browse them all on the WordPress site.
Some are better than others, however, you can’t judge a theme based just upon looks because themes also handle other aspects of your blog behind the scenes – like security of your site, how well it’s optimized in searches, and how easy it is to customize.
You may be able to find a free theme that will work well for you.
However, if you want to take your blog to the next level, it’s a good idea to invest in a premium theme – for looks and function.

Premium Themes (range in cost from $30 – $100 or so)
A premium WordPress theme is usually (not always) better than a free theme because you have to pay for it – this often translates to better written code and better functionality.
With a premium theme you will have better website security, current updates, customer service, better optimization, and typically an easier to work with interface.
Since I started a travel blog, I’ve used quite a few different themes, from free to premium.
I’m now using the Genesis Framework with Studiopress, owned and operated by Copyblogger, and I’m very happy with it.
Within Studiopress there are child themes. These extra themes that give your website an even more custom look.
How to install your WordPress theme
Once you’ve decided on a theme, you can then download it to your computer, and it should be a file like theme.zip.
Next, go to your blog dashboard – you can get there by going to yourblog.com/wp-login.php and typing in your username and password.
To install your new theme, go to Appearance > Themes > Add New > Upload Theme > Find your theme file > Install Now > Activate.
Your new theme should be live on your site once you hit refresh.
We won’t get into further customizing, but you can then proceed to easily add your logo, change the colors, your background, etc.

Step #5: Start Blogging (& Don’t Stop)
Now that we’ve learned how to start a travel blog, it’s time to start blogging.
This might seem like an obvious step, but it’s not.
I’ve witnessed far too many people follow steps 1 – 4, and start to blog, but then give up far too soon, before seeing any results.
Blogging is not easy.
It takes effort, passion, and it can be very time consuming. That’s why blogging works best when you cover a topic you love.
For me, it’s food, travel, and culture.
Over the years I’ve attempted to start a number of other blogs, about things I wasn’t passionate about, and I failed, just because I ran out of will power and ideas and it didn’t take long before I burned out.
Instead of blogging about anything and everything, focus your writing on what you’re really interested in – the niche you won’t get tired of day after day.
Even if your blog is about travel, you can cover a certain aspect of travel, like food travel, fashion travel, or cultural travel.
Write your blog posts in your own personal voice. Use your unique personality, and the knowledge you know about your topic.
Create your blog posts so they are both personal and helpful.
Note: When I was growing up I absolutely hated writing, and I never dreamed I would ever write and earn a living doing it. Little did I know, when I had the opportunity to blog about what I wanted, like food, I loved it and still do.
Even if you don’t love writing, don’t rule out blogging.
What is your goal for blogging?
To keep a record of what you are doing, to make money, to connect with others?
No matter what your goal, commit yourself to blogging, and persevere with it.
Additional travel blogging resources:
This blog post has covered a simple step by step guide on how to start a travel blog, but most of the time I’m a food and travel blogger. I don’t blog about blogging very often.
So next, I’d like to share a few of the websites I read and really gain a lot from, that have truly helped me become a better blogger. I would highly recommend you check these sites out as you dig deeper into blogging or starting an online business:
- Copyblogger – Copyblogger is one of the original blogs I started following when I wanted to learn more about blogging, and it’s still one of the best resources on the web for tips on how to write more effectively.
- Quick Sprout – Run by Neil Patel, Quick Sprout is a goldmine of internet marketing tips, including how to optimize your blog or website for business and making sales.
- Smart Passive Income – Pat Flynn is another amazing blogger who covers successes and fails about building an online business and blogging. His site is packed with helpful information.
- Social Triggers – I owe it to Derek Halpern for inspiring me to start my e-mail newsletter. His content mostly covers internet marketing, and optimizing your site for conversions using psychology.
- Backlinko – This site by Brian Dean is all about SEO (search engine optimization) and offers great advice about building backlinks (which increase your sites authority) to your website and rankings.

What’s next? Take blogging further…
It all depends on what your goal and motivation is for creating a blog, but once you have a blog and are blogging, you have so many opportunities.
You can choose to keep it as a place to share your thoughts or as your public journal, or your goal could be to turn your blog into a business to earn a living from anywhere in the world that has internet.
For myself, I love blogging as a hobby and as a method of learning and sharing, but I also have chosen to do it full-time, and so I have tried, and keep trying many different ways and methods of earning money from my blogs.

Additionally, if you’re interested in a blogging community where you can learn how to turn travel blogging into a business, Travel Blog Success is a fantastic online course, run by David Lee, an online travel blogging friend of mine.
His course is an excellent place to learn about how to start a travel blog, be successful, and earn money from it – it covers tips on blogging, marketing, press, advertising – it’s also a great travel blogging network of other serious bloggers.
Overall, at the beginning of starting your blog, I would encourage you to blog about what you’re passionate about, and to be persistent.

Conclusion
Starting a blog has proven to be one of the most rewarding things I’ve ever done, opening the door for many other opportunities, and allowing my wife and I to be full time travel eaters.
The great thing is:
If you have internet access, and a small budget (even if you don’t know anything about web design or code), you can easily start your own travel blog (or a blog about anything you like).
First, register your unique domain, get hosting, install WordPress, improve the design with a theme, and then start blogging.
I hope this how to start a travel blog guide has been helpful. Don’t wait around, now is the time to start a blog. You never know what opportunities will arise as a result of creating and maintaining your own blog!
Please let me know if you have any questions about how to start a blog by leaving a comment below. I would love to hear from you, and I will do my best to answer your questions.
*NOTE: Some of the links in this guide are affiliate links, and if you choose to purchase I will get a small commission, but at NO extra charge to you, which will help me to continue maintaining migrationology.com. Everything I mention in this article is what I personally use and recommend.
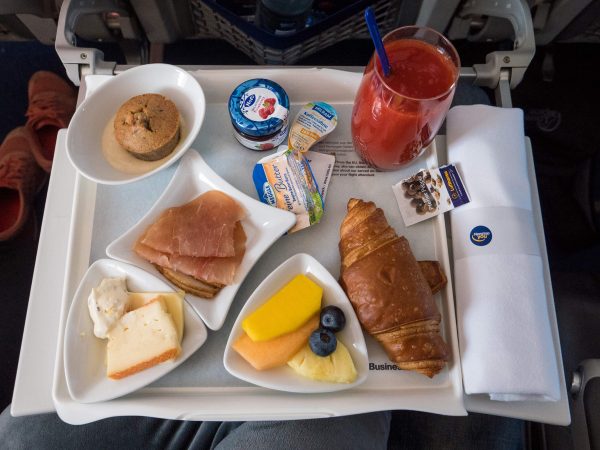
The Best Airplane Food from 10 Star Alliance Flights
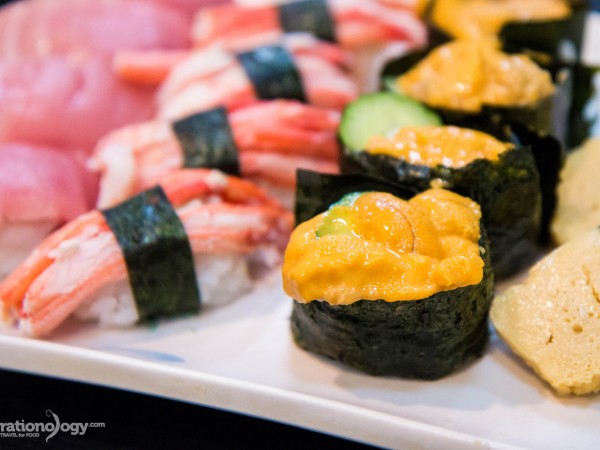
Sushi Worth Going to Osaka to Eat: Harukoma (春駒 支店)
Get exclusive updates
Enter your email and I'll send you the best travel food content.